SystemVerilog Testbench Architecture
Anatomy of SystemVerilog Testbenches
Welcome to the course on Testbench Design using SystemVerilog. In this practical hands-on course we would explore SystemVerilog to design dynamic class based testbenches from the grounds-up. The course would explore the design of the testbenches for verifying the following:
- APB Master System
- Single-cycle RISC-V CPU
This is a hands-on course which means you would be spending more of your time coding various testbench components.
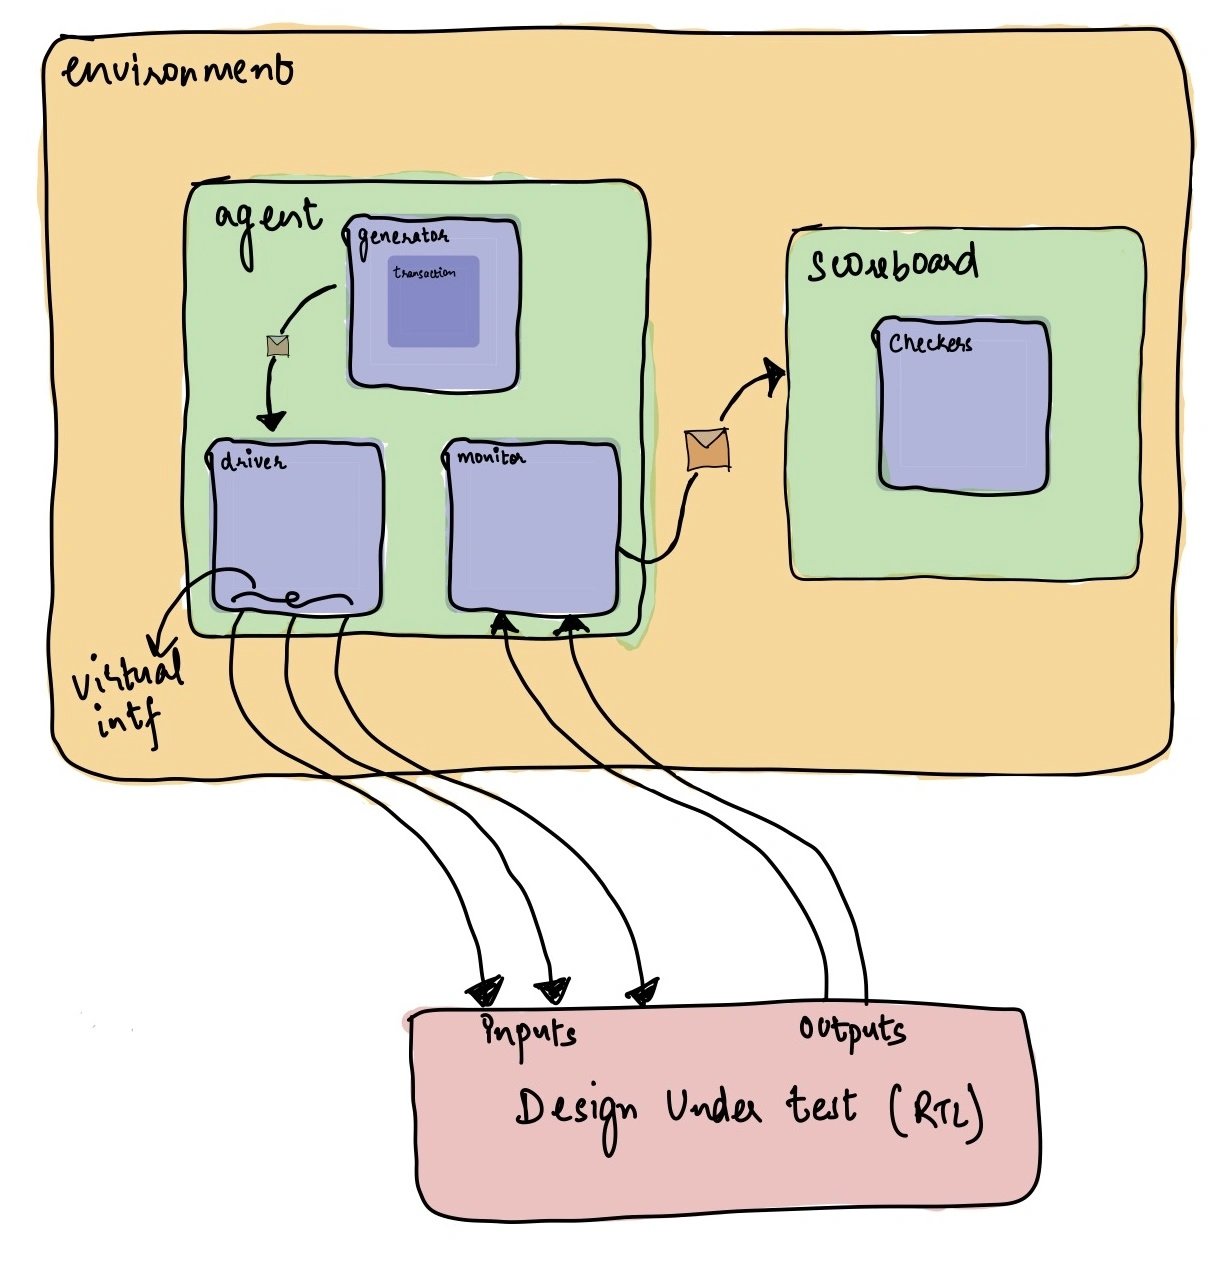
This module would give you an introduction to the common testbench architecture. It would include the description of how modern testbenches are built using various components and how ultimately they all tie together to validate the design under test (DUT). The video explains the overall testbench architecture and then explains the role for each of the following components:
- Transaction
- Generator
- Driver
- Monitor
- Scoreboard
- Agent
- Environment
- Testbech top module
As you can see from the image below, each of these components together build a testbench which validates the RTL.
Coding Exercise
In the previous module, there was no waveform generated since there was no RTL and the testbench also finished at time 0 itself. In this module we would improve the testbench to generate the clock and drive a signal to the instantiated RTL. The RTL implements a simple D flip-flop and the testbench would toggle the D-pin randomly. Make sure to view the waveforms to see the bits toggling.
The video for this module also includes a detailed explaination of the testbench covering each line. Do watch the video to get a better understanding of the testbench code. As always, you could reach out to me via email or discord if you have any further doubts and I'd be happy to help!
Loading the interactive workspace...